

Stripe's Invoicing API is your toolkit for building automated billing workflows directly into your application. It lets you programmatically create, manage, and send invoices, moving you beyond the manual clicks of the Stripe Dashboard into a world of true financial automation.
This isn't just about sending a simple bill; it's about building a robust engine that can handle everything from one-off charges to incredibly complex, multi-item subscription models.
Why Bother With the Invoicing API?
Before we jump into the code, it’s worth asking: why use the API at all? The answer is scalability and flexibility. The API is the bridge between your business logic and Stripe's powerful billing infrastructure, allowing you to automate the entire quote-to-cash process.
For any growing business, this is a game-changer. It means fewer manual errors, healthier cash flow, and a more professional experience for your customers.
Handling Complex Billing Logic Automatically
The real magic of the API happens when your billing needs get complicated. Simple monthly fees are easy, but modern businesses often have far more nuanced pricing.
- Usage-Based & Metered Billing: Imagine you run a SaaS platform that charges based on API calls or data storage. The Invoicing API can track that consumption, tally it up, and generate a perfectly accurate invoice at the end of each cycle without anyone lifting a finger.
- Automated Retainers: If you're a digital agency, you can set up a system to programmatically generate and send monthly retainer invoices. This ensures you get paid on time, every time, freeing you up to focus on client work.
- Dynamic Subscriptions: The API effortlessly handles the messy parts of subscriptions, like upgrades, downgrades, and prorated charges, all through code.
These are common challenges that platforms have been solving for years. For instance, many services have figured out how to automate tutoring invoices, which often involve variable hours and rates, a perfect use case for an invoicing API.
To give you a clearer picture of what the API can do for you, here’s a quick breakdown of its core functionalities.
Stripe Invoicing API Core Capabilities
This table summarizes the key features you'll be working with. Think of these as your primary building blocks for creating a custom billing system.
CapabilityDescriptionBest ForInvoice CreationProgrammatically generate new invoices for customers with specific line items, quantities, and prices.One-time charges, custom billing cycles, and manual invoice generation from your app's backend.Invoice FinalizationFinalizes a draft invoice, making it an immutable record that can be paid.Automating the process of sending an invoice to a customer after a review period or at a set time.Payment HandlingAutomatically attempts to pay an invoice using the customer’s default payment method or sends an email with a payment link.Subscription renewals, auto-pay scenarios, and streamlining the payment collection process.Subscription IntegrationTightly integrated with Stripe Subscriptions to automatically generate invoices for recurring billing cycles.SaaS businesses, membership sites, and any recurring revenue model.CustomizationAdd custom fields, memos, footers, and tax rates to invoices to meet specific business or regulatory needs.Businesses needing to add specific legal text, branding elements, or detailed line-item descriptions.
Each of these capabilities represents a piece of the puzzle. By combining them, you can build a billing workflow that perfectly matches your business model.
The real power of an invoicing API is its ability to transform a manual, time-consuming process into an automated, reliable system that scales with the business. It’s about building a financial infrastructure, not just sending bills.
With support for up to 250 invoice items per invoice and sophisticated finalization workflows, Stripe has built a robust system. You can get a deeper look into Stripe’s integration works on their docs.
While Stripe offers a fantastic suite of tools, our own API is built for businesses looking to simplify global commerce. We let you accept card or crypto payments from your customers, and you receive the funds settled directly as USDC. We also offer native integrations for Discord and Telegram, which are perfect for developers building paid communities and subscription services.
Setting Up Your Development Environment
Alright, before we can start building some slick invoicing features, we need to get your local development environment talking to the Stripe Invoicing API. This is a foundational step, and getting it right from the start will save you a world of headaches later. We're talking about grabbing your API keys, making sure they're secure, and running a quick "hello world" test to confirm everything is connected.
You'll find your API keys waiting for you in the Stripe Dashboard. The crucial thing to remember is that Stripe gives you two sets: test keys for all your development and testing work, and live keys for when you go into production. I can't stress this enough: never use your live keys in a development environment. Mixing them up is a classic mistake that can lead to real, accidental charges and a major security vulnerability if those credentials leak.
Locking Down Your API Keys
Hardcoding API keys directly into your application code is a huge security no-no. It's like leaving the keys to your house under the welcome mat. A much smarter and more secure approach is to use environment variables. This practice keeps your secret keys out of your source code, which is especially important when using version control systems like Git.
Start by creating a .env file in the root directory of your project. Inside this file, you'll store your secret key like this:
STRIPE_SECRET_KEY=sk_test_...
The next, and most critical, step is to add .env to your .gitignore file. This single line prevents you from ever accidentally committing your secret keys to a public or private repository. Trust me, you don't want to be the person who has to rotate keys because they were pushed to GitHub.
Installing the Right Tools
While you could make raw HTTP requests to Stripe, why make life harder? Stripe offers excellent official SDKs (Software Development Kits) for most popular languages. These libraries handle all the tedious boilerplate for authentication and request building, letting you focus on your application's logic.
Here’s how you can quickly install the SDKs for two of the most common backend languages:
- For Node.js: Pop open your terminal and run this npm command.
npm install stripe - For Python: If you're a Python developer, you'll use pip.
pip install stripe
Using the official SDK is a non-negotiable best practice. It simplifies your code and ensures you're interacting with the API in a supported and reliable way.
As you're getting set up, a good online API tester can be a fantastic companion. It allows you to poke at different Stripe endpoints and see the responses in real-time, all without writing a single line of application code.
Making Your First API Call
With your keys secured and the SDK installed, it's time for a quick sanity check. Let's make a simple API call to fetch a list of customers from your test account. This is the "Hello, Stripe!" moment that confirms your setup is working correctly.
Here’s a quick example in Node.js to get you started:
// Load your secret key from an environment variable
const stripe = require('stripe')(process.env.STRIPE_SECRET_KEY);
async function checkConnection() {
try {
const customers = await stripe.customers.list({
limit: 3,
});
console.log('Success! Fetched test customers:', customers.data);
} catch (error) {
console.error('Houston, we have a problem:', error);
}
}
checkConnection();
Run that script. If you see a success message followed by a list of customer objects (even an empty list is a success!), then congratulations! Your environment is ready.
You're now all set to dive deeper into building out your invoicing logic. As you move forward, you'll want to simulate different payment outcomes. For a complete rundown on how to do that, take a look at our detailed guide on using Stripe test cards to make sure your integration can handle anything.
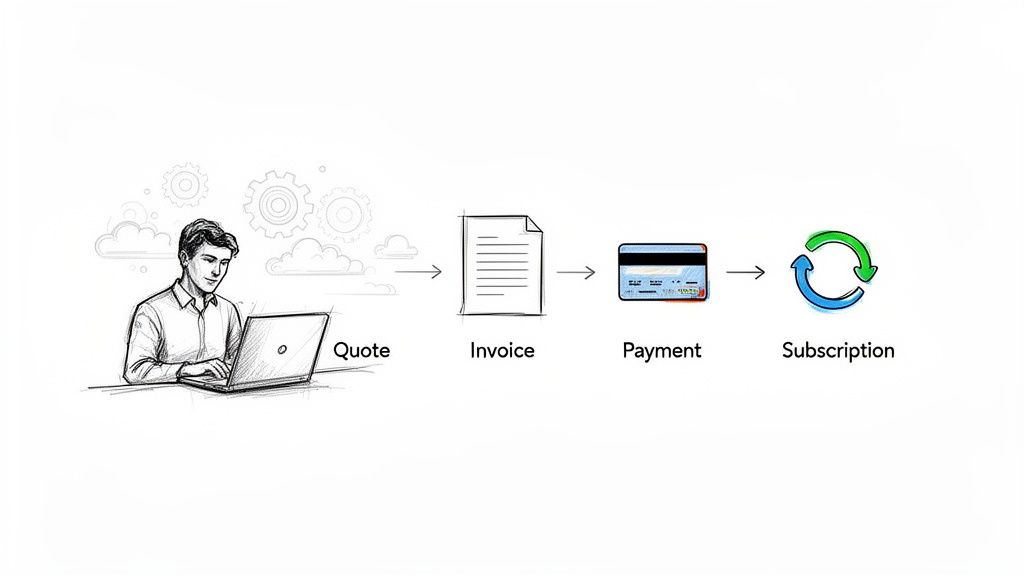
Building Invoices Programmatically

The best way to understand Stripe's invoicing flow is to see it as a series of building blocks. You start with the customer, add individual line items over time, and then bundle them all into a final invoice. This modular approach is incredibly flexible, and the diagram above gives you a high-level look at how these pieces fit together.
Now that your setup is complete, let’s get our hands dirty and build an invoice with the Stripe Invoicing API. You can't send an invoice without knowing who it's for, so everything starts with the Customer.
Think of the Customer object as the central record for all billing activity. It holds their contact details, saved payment methods, and a complete history of their invoices. You can start with just a name and email, but over time this object becomes an invaluable source of truth.
First, Create Your Customer and Line Items
Let's begin by creating a Customer object. This is the foundation for every invoice, subscription, or one-off charge you'll ever create for this person.
cURL
curl https://api.stripe.com/v1/customers
-u sk_test_...:
-d name="Jenny Rosen"
-d email="jenny.rosen@example.com"
Node.js
const customer = await stripe.customers.create({
name: 'Jenny Rosen',
email: 'jenny.rosen@example.com',
});
Python
customer = stripe.Customer.create(
name="Jenny Rosen",
email="jenny.rosen@example.com",
)
With a Customer ID in hand, you can start creating InvoiceItem objects. These are the individual line items on the bill, the "Monthly Subscription," "Consulting Hours," or "Product A." Each InvoiceItem is tied to a customer and sits in a pending state, waiting to be invoiced.
This is where the power of programmatic invoicing really shines. Imagine you run a SaaS product with usage-based billing. Throughout the month, you can create new invoice items as your customer uses features or consumes resources. At the end of the billing cycle, one API call scoops up all those pending items into a single, clean invoice.
Here’s how we'd create a $50.00 line item for "Premium Support."
cURL
curl https://api.stripe.com/v1/invoiceitems
-u sk_test_...:
-d customer="cus_..."
-d amount=5000
-d currency="usd"
-d description="Premium Support"
Keep in mind that the amount is always passed in the smallest currency unit. For USD, that means cents, so $50.00 is represented as 5000. This is a common source of bugs, so always double-check it!
Putting It All Together: Generating and Sending the Invoice
Once you have a customer and at least one pending InvoiceItem, you're ready to create the actual Invoice. This API call looks for all pending items for a given customer and assembles them into a draft.
This draft isn't final yet, which gives you a chance to review it before it’s set in stone. To create the invoice, all you really need is the Customer ID.
Node.js
const invoice = await stripe.invoices.create({
customer: 'cus_...',
collection_method: 'send_invoice',
days_until_due: 30,
});
In this example, we're telling Stripe to automatically email the invoice to the customer (send_invoice) and that payment is due in 30 days.
The final step in the process is finalizing the invoice. Finalization makes the invoice immutable, assigns an invoice number, and moves it to an open status, ready for payment. Once an invoice is final, it can no longer be changed.
The good news is that if you use collection_method: 'send_invoice', Stripe handles finalization for you. The moment the invoice is created, it's also finalized and sent. If you needed to do it manually for some reason, the call is straightforward.
The invoice is automatically finalized and sent
if you use collection_method: 'send_invoice'
This is an explicit finalization call if needed
invoice = stripe.Invoice.finalize_invoice("in_...")
This entire workflow, from creating a customer to sending the bill, is the core of any advanced invoicing integration. At our company, we use a simple API to manage the whole payment cycle, but with one major difference: your customers pay with their card, and you get the funds settled directly as USDC. This sidesteps the usual headaches of cross-border currency conversion.
Managing Advanced Billing Scenarios
Once you've mastered sending basic invoices, you can start digging into where the Stripe Invoicing API really shines: handling the complex, dynamic billing that modern tech companies rely on. This is about more than just sending a bill; it’s about building a revenue engine that can keep up with your business logic, especially for SaaS, infrastructure, or any subscription model.
A perfect example of this is usage-based or metered billing. It’s pretty much the standard for today's tech products. Instead of a flat monthly fee, your customers pay for what they actually use, whether that’s API calls, gigabytes of data stored, or the number of active users on their account.
Implementing Usage-Based Billing
The trick to getting metered billing right is to report usage as it happens. You can't just wait until the end of the month and hope to tally everything up accurately. The process is straightforward: you create usage records against a specific subscription item whenever a customer consumes more of your service.
Let's say you bill for data storage. Every time a user uploads a file and their total storage footprint increases, your system should fire off an event to Stripe. At the end of the billing cycle, Stripe takes care of the heavy lifting. It automatically adds up all those individual usage records, calculates the final amount, and adds it as a line item on the customer's invoice.
Stripe's system is built to handle this at a massive scale. The standard endpoint can take up to 1,000 API calls per second in live mode, which is more than enough for most applications. Just keep a couple of technical constraints in mind: usage values must be submitted as whole integers, and the timestamps for those events can't be more than 35 calendar days old. You can get into the nitty-gritty by reading how Stripe handles usage event recording in their docs.
Programmatically Managing Subscriptions
Of course, a complete billing system needs more than just usage tracking. You also need full, programmatic control over the entire subscription lifecycle. By pairing the Invoicing API with the core Stripe Billing API, you can automate everything.
This means you can write code to handle common customer actions, like:
- Defining New Plans: Spin up new service tiers, think Basic, Pro, Enterprise, directly from your backend.
- Handling Upgrades and Downgrades: Move a customer from one plan to another without a single click. Stripe will even handle the proration calculations for you.
- Pausing or Canceling Services: Let users pause their subscription for a few months or cancel it entirely, all triggered by actions within your app.
When you combine real-time usage reporting with automated subscription management, you get a billing system that truly runs itself. A customer can sign up, have their usage tracked, get an accurate invoice, and upgrade their plan, all without any manual work from your team.
This level of automation is what allows a business to scale without its billing operations getting messy. For a much deeper look at this model, we've put together a complete guide on Stripe usage-based billing.
While Stripe offers an incredible foundation, our API is built to solve a different set of challenges, particularly for global businesses. We offer a simple API that lets you accept card or crypto payments from customers anywhere in the world, with all your revenue settling directly to your wallet as USDC. It's a different way to think about cross-border commerce, designed to eliminate currency conversion headaches and payout delays.
Letting Webhooks Handle the Heavy Lifting
So you’ve created and sent an invoice with the API. Great. But the real power of a good billing integration comes from what happens next. This is where Stripe Webhooks completely change the game.
Without webhooks, your application would be stuck constantly asking Stripe, "Is the invoice paid yet? How about now?" This method, called polling, is inefficient and slow. Webhooks flip that model on its head. Instead, Stripe proactively tells your server, "Heads up, that invoice was just paid," the instant it happens. This event-driven approach is the foundation for building truly automated financial workflows.
This is especially true for more complex scenarios like metered billing, where you're charging customers based on usage. The entire process hinges on automated triggers.
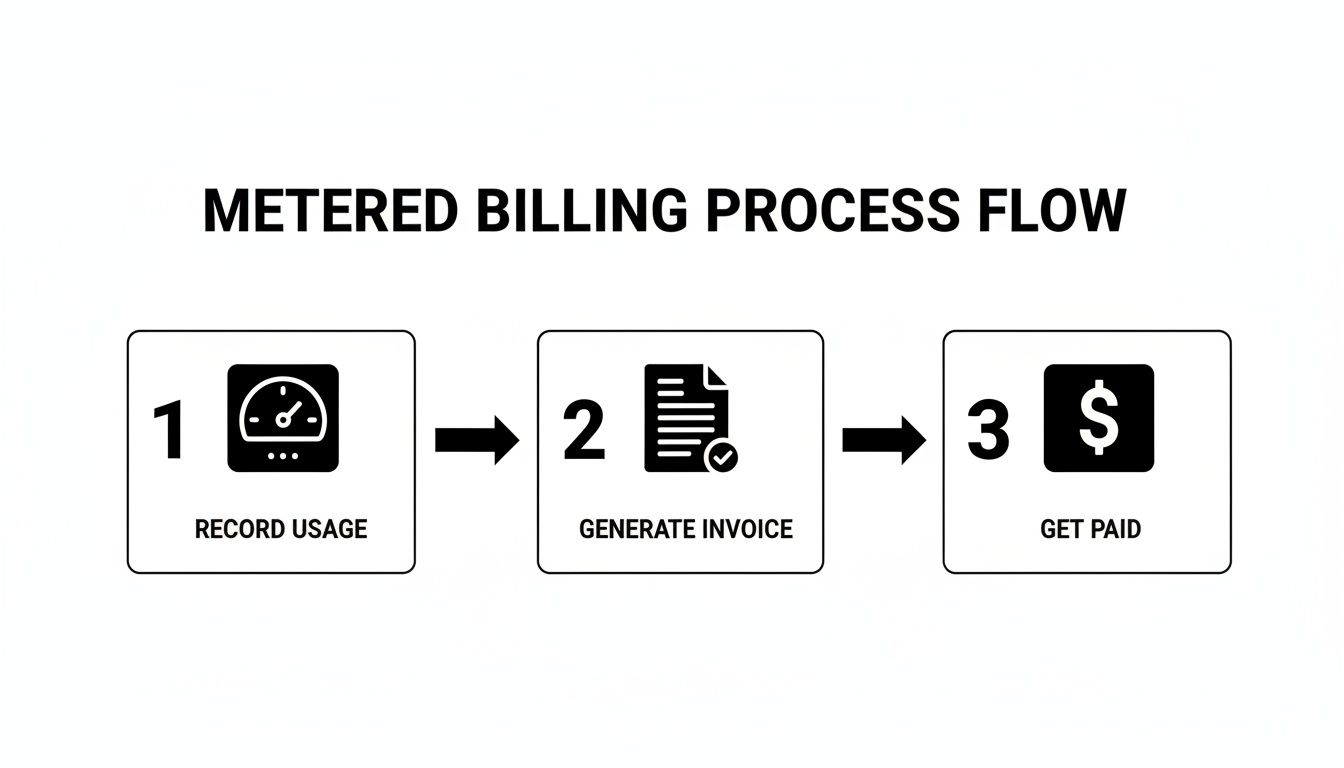
As you can see, from recording usage to finally getting paid, each stage can kick off the next one automatically. Webhooks are what connect these dots, turning a multi-step process into a smooth, hands-off operation.
Tapping into Key Invoice Events
To get started, you’ll need a webhook endpoint, a public URL on your server where Stripe can send event notifications via a POST request. Once you set that up in your Stripe Dashboard, you can subscribe to the specific events that matter for invoicing.
While there are many events, a few are absolutely essential for any invoicing workflow:
invoice.paid: This is the one you’ve been waiting for. It’s your green light. The moment you receive this, you know it’s safe to grant the customer access to your service, ship their product, or simply update their account status in your own database.invoice.payment_failed: Payment didn't go through. This event is your cue to kick off your dunning process. Maybe you send an automated email asking the customer to update their card, or you flag the account for manual review.invoice.finalized: An invoice becomesfinalizedwhen it's complete and ready to be paid. This is a great trigger for internal bookkeeping, like creating a corresponding entry in your accounting software before payment is even attempted.
Building a listener for these events is fairly direct. Here’s a basic example of an endpoint using Express.js in a Node.js environment to show you how it works.
// A simple Express server to handle webhook events
const express = require('express');
const app = express();
const stripe = require('stripe')('sk_test_...'); // Your Stripe secret key
// Use middleware to parse the raw request body, which Stripe requires
app.post('/webhook', express.raw({type: 'application/json'}), (request, response) => {
const sig = request.headers['stripe-signature'];
const endpointSecret = 'whsec_...'; // Your webhook signing secret from the Dashboard
let event;
// Verify the event came from Stripe
try {
event = stripe.webhooks.constructEvent(request.body, sig, endpointSecret);
} catch (err) {
console.log(Webhook signature verification failed., err.message);
return response.status(400).send(Webhook Error: ${err.message});
}
// Handle the event
switch (event.type) {
case 'invoice.paid':
const invoicePaid = event.data.object;
// Logic to fulfill the order, grant access, etc.
console.log('Invoice was paid!', invoicePaid.id);
break;
case 'invoice.payment_failed':
const invoiceFailed = event.data.object;
// Logic to notify the customer and start the dunning process.
console.log('Payment failed for invoice.', invoiceFailed.id);
break;
default:
// Unexpected event type
console.log(Unhandled event type ${event.type});
}
// Acknowledge receipt of the event
response.send();
});
app.listen(4242, () => console.log('Server is running on port 4242'));
A word of caution: always verify the webhook signature. This is non-negotiable in a production environment. It’s a security check that confirms the request is genuinely from Stripe and not a bad actor trying to spoof events. As you can see in the code, the Stripe client libraries make this easy. Don't ever skip this.
Our entire platform is built on a foundation of a clean API and highly reliable webhooks. We use them to manage global card payments where customers pay by card and businesses receive USDC. This kind of event-driven architecture is what allows us to eliminate the typical delays and currency conversion headaches of cross-border commerce.
Tracking Your Business Health with Billing Analytics
Once your invoicing integration is running, you're doing more than just collecting payments. Every transaction, every new subscription, and every cancellation is a breadcrumb of valuable business intelligence. The real magic happens when you start connecting those dots.
Think of it this way: your billing data is a live feed of your company's financial health. By tapping into it, you move from simply processing invoices to actively understanding where your business is headed.
Key Metrics to Monitor
When you hook your invoicing data into an analytics tool, you can start tracking the vital signs of your business in almost real-time. For any company built on recurring revenue, a few key performance indicators (KPIs) are absolutely non-negotiable.
These metrics go beyond just top-line revenue; they tell you how healthy and sustainable that income really is.
- Monthly Recurring Revenue (MRR): This is the lifeblood of any subscription model. It’s the predictable, stable revenue you can count on coming in each month.
- Average Revenue Per User (ARPU): This metric shows you exactly how much a typical customer is worth. Is your ARPU trending up? It’s a great sign that your pricing tweaks or upselling strategies are paying off.
- Customer Churn Rate: This is the percentage of customers who leave within a given period. A sudden spike in churn can be the canary in the coal mine, signaling issues with your product, pricing, or customer support.
The goal is to make data-driven decisions. Are customers churning after a price increase? Is a new feature driving up ARPU? Your billing analytics provide the answers.
Stripe’s own infrastructure gives finance teams a surprisingly deep look into these numbers, including MRR breakdowns for individual subscribers and detailed change logs. The platform’s focus on ARPU as a core indicator makes it an essential tool for revenue forecasting. You can learn more straight from the source with Stripe's advanced subscription analytics.
Of course, tracking these numbers is just one part of the equation. You also need to account for this income correctly through a process called revenue recognition. For a deep dive, check out our guide on how to approach revenue recognition with Stripe.
Our API is built to simplify global commerce even further. We let you accept traditional card payments or crypto from customers and get your funds settled directly as USDC. This provides a direct path for revenue without the complexities of traditional banking systems.
Frequently Asked Questions
As you start working with the Stripe Invoicing API, you're bound to run into a few common questions. Let's get ahead of them and clear up some of the hurdles we see developers face all the time.
How Do I Handle Taxes and Discounts with the API?
This is a big one. You've got complete control over taxes and discounts through the API, but you need to know which objects to use.
For taxes, it all starts with creating TaxRate objects. You can set these up to be either inclusive (baked into the price) or exclusive (added on top at the end). This is incredibly useful for handling different tax rules based on a customer’s location, which you can determine dynamically in your code.
When it comes to discounts, Stripe gives you a couple of solid options. For a simple one-off price reduction on an invoice, you can apply a Coupon or PromotionCode object directly. If you're running a longer-term promotional campaign, you can attach these to a customer's subscription for an ongoing discount.
Can I Customize How Invoices Look?
Absolutely. While your API calls are busy handling the invoice data and logic, the actual look and feel are managed right in your Stripe Dashboard. This is a smart separation that keeps developers out of design decisions.
Just navigate to the Branding settings in your dashboard. From there, you can upload your logo, pick your brand colors, and even add custom footer text. These changes are automatically applied to every invoice your system generates, both the PDF attachment and the hosted invoice page, keeping everything professional and consistent.
Your code builds the invoice, but the Stripe Dashboard gives it a professional, branded appearance. This separation of concerns means developers can focus on logic while marketing or design teams can manage the visual identity without touching the code.
What’s the Best Way to Test My Invoice Integration?
The golden rule: always use your test API keys in a dedicated development environment. Never, ever use live keys for testing. Stripe makes this easy by providing a whole suite of test card numbers you can use to simulate everything from successful payments to declines and other card errors.
Your webhook handler is the other critical piece to test. For this, the Stripe CLI is your best friend. It lets you forward webhook events directly to your local machine, so you can see if your invoice.paid logic works without deploying your code to a public server.
Make sure you test the entire customer lifecycle, from invoice creation to both successful and failed payments. This is the only way to be confident your application will handle real-world scenarios correctly before you go live.
Our company provides a simple API that lets any business accept payments by card or crypto, and receive funds directly as USDC. This approach simplifies global sales and provides a stable payout currency. We also offer native integrations with Discord and Telegram for subscriptions and paid access. To learn how we can help your business, visit us at https://suby.fi.